Wednesday, September 24, 2014

Coffee Shop Latte Recipe (Starbucks, Dunkin' Donuts)


This is another recipe I got from a friend who worked at Starbucks.   So many people wonder what is the big secret to making Starbucks (or Dunkin' Donuts) style lattes at home (iced or hot).   Well…   Their big secret is, they DON’T use regular coffee,  OR water, in a latte!  Nope.   That waters the drink down too much.  The idea is FLAVOR, and you don’t get flavor when the bulk of your drink is WATER.   Coffee shops want return business, and they stick to pure flavor— so lattes are made from a shot of espresso, some milk and flavored syrups.  That’s it.  No water added (except ice).   No espresso on hand?   No problem!  You can mimic a shot of espresso by mixing a single serving packet of instant coffee with hot water.   So here is a basic recipe of pretty much most coffee shop lattes, which you can make at home and save tons of money, but still get that great taste you love.     

Coffee Shop Latte Recipe (Starbucks, Dunkin Donuts)

Ingredients:
1 Starbucks iced coffee single serving packet, or any single serving packet of instant coffee  (sweetened or unsweetened), 
 OR use 1-2 shots espresso
2 tablespoons sugar or sugar substitute (leave this out if using pre-sweetened packets)
3 tablespoon HOT water (leave this out if you’re using espresso)
2 cups milk (hot for a hot drink, cold for an iced drink)
Coffee flavor syrup of your choice, such as chocolate, vanilla, hazel nut, etc.   You can also use those little Coffeemate single serving creamer cups, they have fantastic flavors available!

Directions:
1.       In a large glass, mix together the coffee packet with the hot water (or the espresso), sugar (only if coffee packet is unsweetened) and hot water.  Then add your flavor syrup (or flavored creamer).  Blend very well, until completely smooth. Heating the water up in the microwave for 20 seconds before adding it, makes the mixture even smoother. 

2.      Then pour 2 cups of milk into the ice/coffee mixture and blend well.  If making an iced drink, add ice to the mixture BEFORE adding the milk.  If making a hot drink, microwave or boil the milk until it reaches desired temperature.

3.      If desired, top with whipped cream and an extra drizzle of your flavor syrup over the top for garnish.

Monday, September 22, 2014

Caramel Apple Cheesecake Bars


I had to add this one.  And admit it-- when you look at the picture, your mouth waters.   I mean who doesn't love cheesecake?  And caramel apples?  Put them together and you have magic!  lol.   You are essentially making your own graham cracker crust from scratch here, so I guess you could use crushed graham crackers with butter and sugar instead.   But this way you get more bragging rights.

Caramel Apple Cheesecake Bars

Crust:
2 cups all-purpose flour
1/2 cup firmly packed brown sugar
1 cup (2 sticks) butter, softened

Cheesecake Filling:
3 (8-ounce) packages cream cheese, softened
3/4 cup sugar, plus 2 tablespoons, divided
3 large eggs
1 1/2 teaspoons vanilla extract

Apples:
3 Granny Smith apples, peeled, cored and finely chopped
1/2 teaspoon ground cinnamon
1/4 teaspoon ground nutmeg

Streusel Topping:
1 cup firmly packed brown sugar
1 cup all-purpose flour
1/2 cup quick cooking oats
1/2 cup (1 stick) butter, softened

Directions:

Preheat oven to 350 degrees F.

In a medium bowl, combine flour and brown sugar. Cut in
butter with a pastry blender (or 2 forks) until mixture is
crumbly. Press evenly into a 9x13 baking pan lined with
heavy-duty aluminum foil. Bake 15 minutes or until lightly
browned.

In a large bowl, beat cream cheese with 3/4 cup sugar in an
electric mixer at medium speed until smooth. Then add eggs, 1
at a time, and vanilla. Stir to combine. Pour over warm
crust.

In a small bowl, stir together chopped apples, remaining 2
tablespoons sugar, cinnamon, and nutmeg. Spoon evenly over
cream cheese mixture.

Sprinkle evenly with Streusel topping (for this topping, in a small bowl, combine all ingredients. I like to really combine it by using my clean hands to thoroughly combine the
butter into the mixture).

Bake 40-45 minutes, or until filling is set. Drizzle with
caramel topping and let cool. Serve cold and enjoy!


Friday, September 19, 2014

Dad's Chicken And Canned Biscuit Dumplings


Well, what can I say?  This is a timeless classic our family frequently ate, and I totally forgot to add it!  But we always did it our own simple way.  Sometimes we used fresh cut vegetables.  Sometimes we used any old canned veggies we had on hand.   Sometimes we didn't have stock or bouillon, and we compensated the flavor in other ways!  lol.  We were creative folks.   But this is how we preferred to do it.  TIP:  The leftovers can be simmered down thicker and made into an excellent chicken pot pie!

Dad's Chicken And Canned Biscuit Dumplings

Ingredients:
 
2 tablespoons cooking oil
1 large onion (red, yellow or white) coarsely chopped
1 fryer chicken cut up, skin removed (or the equivalent in chicken pieces)
1 tablespoon dried basil flakes
1 tablespoon dried parsley flakes
½ tsp poultry seasoning
1 tablespoon minced garlic
½ tsp ground rosemary
2 bay leaves
6 small cubes (or 3 large cubes) of chicken bouillon crumbled  and dissolved in 6 cups hot water (or use 6 cups chicken stock instead)
1 ½ to 2 cups whole milk
3 tablespoons butter
3 sticks of celery, sliced (optional)
1 can whole kernel corn (with juice)
3 carrots, sliced ¼ inch thick (or canned slices)
1 can sweet peas OR green beans (with juice)
4 tablespoons corn starch or flour
Salt and pepper to taste
¼ cup cold water
1 can of canned biscuits (regular or grand size, any brand you have)

Directions:

1.        In a large, wide pot, heat the oil over medium heat.   Add the onions and fry until clear, stirring occasionally.   Add the chicken, basil, parsley, poultry seasoning, garlic, rosemary and bay leaves.  Blend well and let the chicken cook in the spices and onions for about 15 minutes, stirring occasionally.
2.       Add bullion / water mixture (or chicken stock). 
3.       Add milk, butter, celery, corn, carrots, peas and blend well.  Then salt and pepper to taste.   Bring to a boil for 5 minutes, then reduce to a simmer for about 45 minutes.  Add more water or chicken stock, if the liquid gets too low (it should always be at least 1 or 2 inches above vegetables).  Stir occasionally. 
4.       In a small bowl, mix together the corn starch (or flour) with the cold water.  Beat out any lumps.   Pour immediately into the soup mixture, while stirring, to prevent clumps.   Simmer about 5 minutes until soup begins to thicken.   Or add more cornstarch (flour) / water mixture, if its not as thick as you like.   If you add more, simmer an additional 5 minutes.   Stir occasionally.
5.       Open the can of biscuits.  Turn the soup pot up to medium-high.    Separate the biscuits and place them in the soup pot at the top.  Dunk each biscuit slightly to moisten the top with soup liquid.   Place a lid over the top of the pot and cook the biscuit/dumplings for about 10 to 15 minutes, until done.   They will puff up to double their size.   Try to separate them carefully.  Soup may also thicken a little more as the dumplings cook. 
6.       Remove soup pot from heat and let soup stand uncovered for 10 minutes.  Serve. 

Wednesday, August 6, 2014

Melissa's Homemade Rice-A-Roni


 "Rice-A-Roni, the San Francisco treat." 

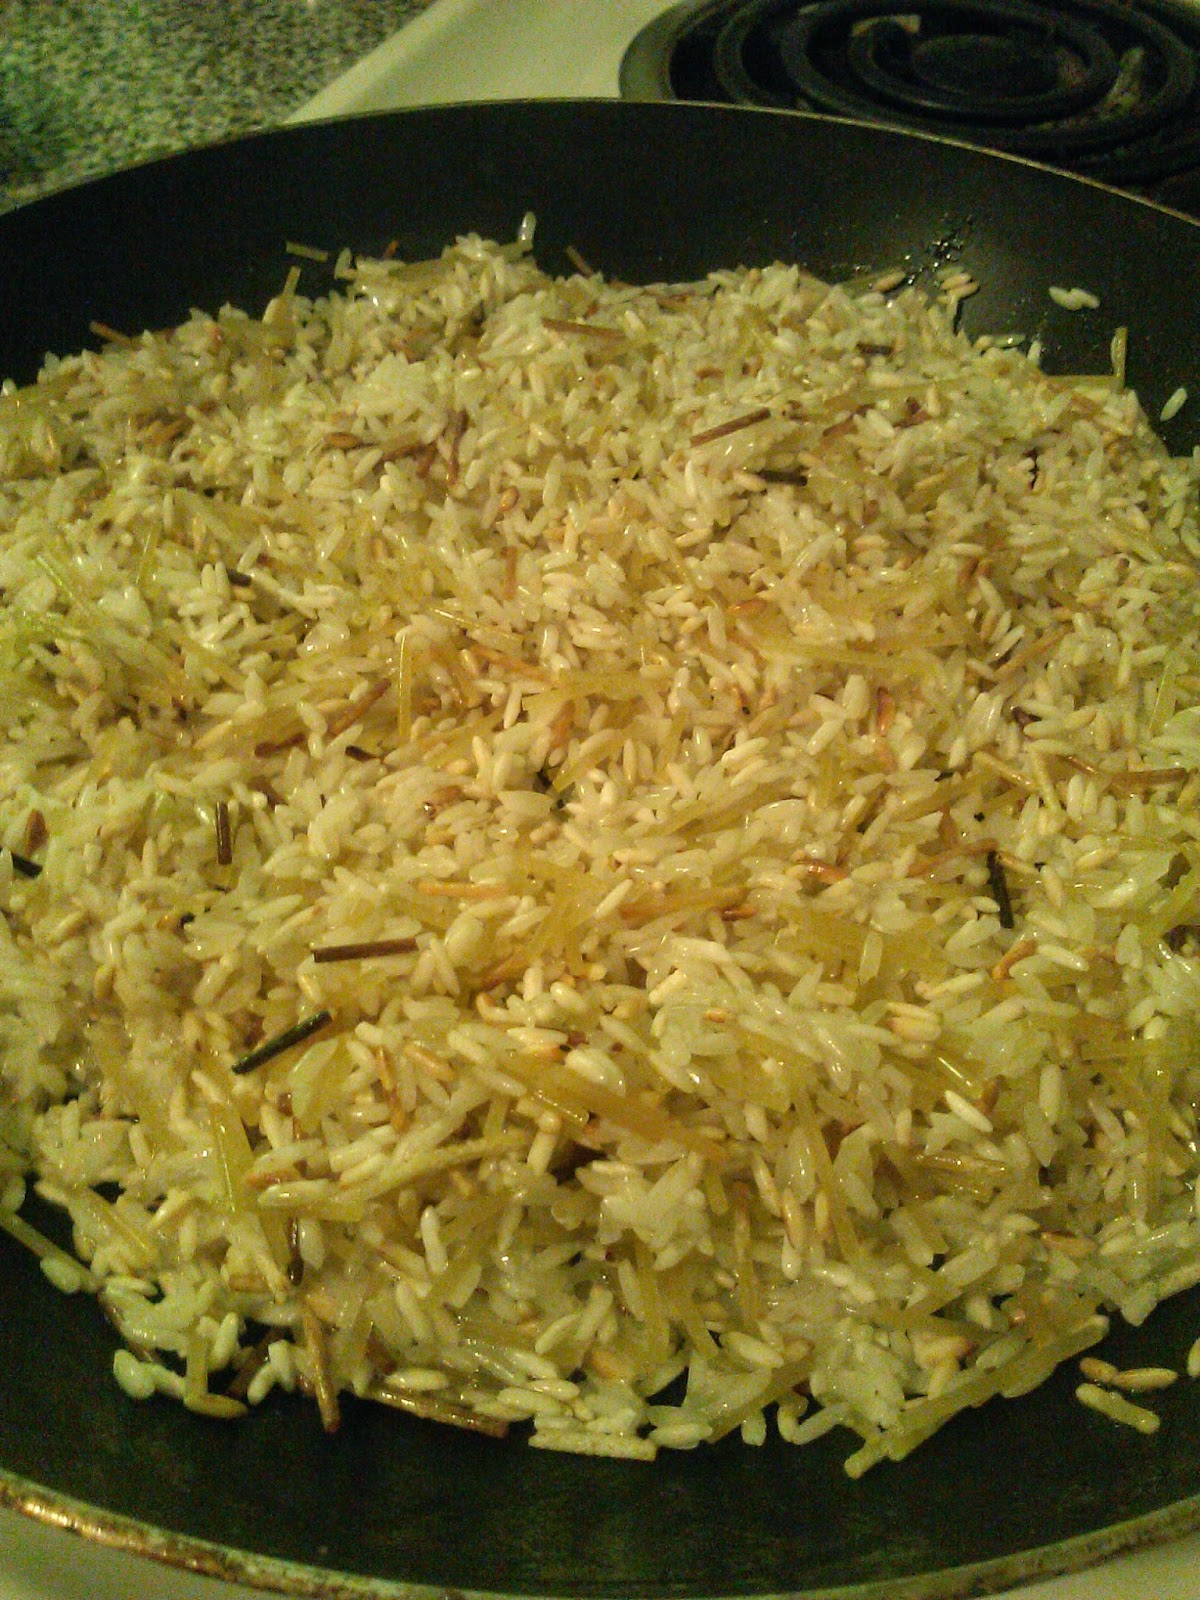
I can still hear that old jingle in my head followed by the trolly car bell 'ding'.   In the past, I always ate this dish from the box (like most Americans).    But as I grew up, I would occasionally find myself cooking dinner on one of those "a few more days till pay day" nights, and wanting a tasty side dish.  But I was out of a few pre-packaged things.   So I figured out how to make a pretty good rice-a-roni side dish, with just a few common ingredients most people have in their kitchen.  Hopefully you will find this helpful too on a night when you don't want to make a trip to the store just for a box of it...   I've also had "thank you" emails from people who are living and working outside the USA, where they cannot buy Rice-A-Roni in a store, and they miss it sooo much, so that may be another reason for learning to make it yourself.   Or just for the bragging rights, lol.   I used chicken bouillon for this recipe.  But you can use beef, pork, or vegetable-flavored.   You can also use broth instead of the water bouillon mix.  Maybe add some extra salt.  This recipe makes about as much as a regular box of Rice-A-Roni.

Melissa's Homemade Rice-A-Roni

Ingredients:

1/4 cup Uncooked angel hair spaghetti pasta, broken up in 1/2-inch pieces(break it in small batches)
3/4 cup uncooked long grain rice
2 tablespoons butter or margarine
1 tablespoon cooking oil
2 cups hot water
2 cubes of Maggi chicken or beef bouillon-- the soft, crumbly kind with the larger 1” x ½ inch cubes-- or just substitute the 4 cups of water and bouillon with 4 cups of broth (you can also use a packet of "beefy onion soup mix", its amazing!).

Directions:

1.       Start by pinching out very small batches of the pasta, and breaking it into little half-inch bits.   Drop them into a measuring cup until you have 1/4 cup.


2.       Measure out 3/4 cup of uncooked rice.   Combine in a bowl with the pasta bits, and mix until blended well.  


3.       Crumble and melt your bullion cubes into the 2 cups hot water, stirring to dissolve well.  Set aside. 


4.       In a large skillet with a well-fitting lid, melt the 2 tablespoons of butter/margarine and 1 tablespoon of cooking oil together (oil keeps butter from burning).  


5.       Raise to medium-high heat.  Dump in pasta/rice blend.   Stir to coat the rice in the oil/butter mixture.  You don’t want any pieces to be dry.  
6.       Spread rice out evenly over bottom of pan, so as much of the pasta gets heat exposure as possible.  Cook on medium high, stirring 20 seconds or so, until the pasta begins to turn golden brown.   Stirring will rotate the pasta so it will all get a chance to brown, and prevent burning.  


7.       Pour in your hot water/bullion mixture and blend well with the rice.   Turn the heat up to high and bring to a boil.   Once water is boiling, cover with a lid and reduce heat to low.   Leave rice alone for 20 minutes. DO NOT lift the lid.  Come back and check to see if it is done, by tasting some from the center.   Tilt the pan-- if there is still leftover water, or rice is not yet done, cover and let it finish cooking.   


8.       Remove from heat, uncover and let stand 5 minutes.
Serve hot as a side dish.


Auntie Anne's Soft Pretzels (Secret Recipe)


Ok everyone, if you love those hot, soft, slightly-sweet yet very buttery Auntie Anne's soft pretzels you find in airports, malls and some large shopping centers...   Then this recipe is going to make you extremely happy!   You see, they do sell Auntie Anne's at-home pretzel baking kits, complete with the secret pretzel mix, and other ingredients to mix up at home.   I got this particular recipe from a former Auntie Anne's employee who took one of the kits home and did some tedious figuring on the contents and ingredients, so we can all make our own at home, without having to buy the kit!  But I am sorry, I cannot tell you who he is.

Anyway, I just wanted to say that I have lived in Germany for a few years, and that is pretty much the home of pretzels.  Me and my Dad used to buy authentic German soft pretzels from the street venders over there.  Europeans use a much finer-ground flour than we do, and oooooohhhhh does it make for some soft, tender bread!   Mmmm.   And I can say, Auntie Anne's was the closest I have ever tasted to German pretzels.   But in America, the closest you can get to European flour, is bread flour, or a regular flour / bread flour mix.  Its not that big a difference though, you can just use regular flour, it still comes out awesome.   

Auntie Anne's calls the wash solution they bathe the pretzels in a "special solution".   But frankly, its just baking soda and water, lol.   Similar to what bagels would be bathed in before baking.   It helps to brown them.   In the past, it was done with culinary lye...    The original name is Laugenbrezel,  Laugen means basically lye.   But baking soda is...  A bit safer?  Anyway,  below is the recipe, with the same measurements and cooking instructions as in the box of the Auntie Anne's at-home baking kit.   Along with a pretzel twisting video, done by and Auntie Anne's "expert" pretzel maker.   Enjoy!

Auntie Anne’s Soft Pretzels (Secret Recipe)


Ingredients:


Dough Mix:
1 ¼ cups warm water
1 tablespoon plus ¼ tsp dry yeast
¾ cups powdered sugar
1 ½ tsp salt
2 tsp vegetable oil
3 ¾ cups all purpose flour (its better to use 3 cups regular flour and 3/4 cups bread flour)

Baking Soda Bath:
4 cups hot water (as hot as tap will get)
½ cup baking soda

Other ingredients:
¼ cup melted butter
Kosher or pretzel salt

Directions:
1.      In a large bowl, dissolve yeast in warm water, let stand 5 minutes. Whisk in vegetable oil.
2.      In a separate bowl, mix flour, powdered sugar and salt.   Gradually add flour mixture to water/yeast mixture.   Add little bits at a time, blending well.   Only add enough flour to form into a slightly sticky dough.  Dough should come away from the sides of the bowl, but it should be soft and easy to knead, not too dry or firm / dense.   Knead 5 minutes on lightly floured surface.  Dough will be nice and smooth when it is ready.  
3.      Place dough into lightly oiled bowl.  Lightly oil some plastic wrap, and cover the dough with plastic wrap (oiled side facing the dough).  Allow dough to rise in a warm place for about 45 minutes, or until dough doubles in size. 
4.      Preheat oven to 425.
5.      Make a bath for the pretzels by mixing baking soda in the 4 cups of warm water until it is dissolved. 
6.      Lightly oil a surface on your counter to lay the dough on.   Remove dough from bowl (without flattening it) and place it on the counter.   Cut dough into 8 equal strips, using a knife, a large pizza roller or a pastry cutter.  Strips should be 1/5 inches wide and 8 inches long.   Cover the rest of the dough, while you work with each piece of dough. 
7.      Roll each dough strip into pretzels, as wide as your finger, long as your arm.   Using the method in this video: 


8.      Dip each pretzel in baking soda solution.  Lay pretzel on a clean kitchen towel to remove excess baking soda solution for a second.  Then place on a lightly greased baking sheet. 
9.      Salt the pretzels (if you want cinnamon-sugar pretzels, leave them unsalted). 
10.  Bake pretzels for 4 minutes, then rotate the pan halfway and bake an additional 2 to 5 minutes, depending how hot your oven bakes.  Pretzels should be golden with a couple of brown spots, but not completely brown all over. 
11.  Remove from oven, let cool a couple of minutes.   Brush with melted butter and eat! (if you want cinnamon-sugar pretzels, dip them in cinnamon/sugar mixture after brushing with butter).

Makes 8 pretzels