Thursday, November 13, 2014

Turkey Giblet Gravy


If you are in a hurry, you can always get turkey gravy in a jar or can…   But lets be honest—NOTHING  beats the taste of fresh, homemade turkey giblet gravy!  Its really not that hard, so if you have never done it, and aren’t sure what to do, I can walk you through it until you are a master.   My parents took giblet gravy on a holiday very seriously.  We never cut corners on this, we always made “the real thing”.   Giblet gravy is so much more than a sauce.  Its the very important, slow-cooked, pure essence of the entire roasted turkey itself!  It enhances the flavor of the meat, compliments it perfectly and captures the very best natural flavors the bird has to offer.   Although the bird itself is delicious, we often saw the gravy as the true star of the holiday dinner table.  We drizzled it over our meat, stuffing, potatoes…   Even dipped our bread in it.   No holiday meal is complete, without the gravy.  

Turkey Giblet Gravy

Ingredients:
--Raw Giblets of one turkey (neck, heart, liver, etc.)
--Water (start with 6 cups, add more as needed)
--Drippings from roasting pan of cooked turkey (can be added gradually while cooking the turkey, saving some for basting, then add all of it after turkey is done)
--Extra salt and pepper to taste, if needed
--4 tablespoons corn starch or flour
--½ cup cold water

** Start making your gravy as soon as possible.  Preferably as soon as you put your turkey in the oven, or even right before then.  The longer you cook the giblets and gravy base, the more tender they will be and the better your gravy will turn out—it will also make your house smell wonderful!   This recipe was meant to be used while roasting a holiday turkey in the oven.   But if you are not roasting a bird, and you simply want to make this gravy, use 2 cups of chicken broth, in place of roasting pan drippings. 

Directions:
1.        Place the raw giblets and 6 cups of water in a medium pot.  Bring to a boil, then reduce heat to medium.   Allow giblets to simmer until the last 45 minutes before your turkey is done roasting.  If the water in your pan gets low, add enough to bring it back up to the original level.   Or more, depending on how much you want to make. 
2.       As the giblets simmer, gradually steal bits of pan drippings from your turkey pan, and add it to your gravy water.   As the bird cooks, more and more pan drippings will drain from the bird.  Be sure to leave enough for basting your bird.
3.       At the last 45 minutes before your bird is done, remove giblets from the water pot.  Leave the water simmering.
4.       If you don’t like meat or giblet bits in your gravy, sip to the next step.  But if you do-- place giblets on a plate and set them in the freezer for 5 minutes or so, until they are cool enough to handle.   Once they are cool, peel all the meat off the turkey neck.  Throw away the bones.  Gather the meat into a small pile and chop it up very fine with a sharp knife.  Now chop the heart, liver, etc. (or any pieces you like and discard the others) into very small pieces as well.   Place finely chopped giblet pieces back into the water pot. 
5.       When your bird is done and resting on the counter, take all the remaining drippings out of the turkey roasting pan and add it to your giblet water pot.  Add any extra salt or pepper now, to your taste. 
6.       Place the 4 tablespoons of corn starch (or flour) in a cup and add the ½ cup cold water.   Mix very thoroughly with a fork until it is perfectly blended and there are no lumps.   Pour immediately into the giblet gravy pot (do not allow the corn starch/flour to settle in the cup).   Stir the pot quickly to prevent any clumps from forming. 
7.       Turn the heat up and bring the gravy to a boil for 5 minutes, to help it thicken.   If you want the gravy thicker, repeat step 6 with more water/cornstarch/flour mixture.  Wait an additional 5 minutes to check the thickness.   Stir frequently.  Remember, gravy will also thicken quite a bit as it cools.
8.       When gravy is as thick as you like, remove the pot from the heat.  Transfer to a gravy bowl/vessel and serve over your turkey and mashed potatoes. 

Traditional Holiday Roast Turkey (Simple)


Many people are afraid to attempt cooking a turkey. But really, it is one of the most simple things you can cook! It literally is just rubbing some spices and butter over the outside, covering it, and putting it in the oven. True, some experienced turkey fans do get fancy with flavors and techniques. I have done that several times myself, and it is fun. But most people just want a good, traditionally-seasoned roasted turkey for the holidays. That is what I am sharing here. My recipe is easy, no headache, and even people who "don't really cook" can do it. In the end, you will have a delicious roasted turkey as the highlight of your table. Below the recipe, I have also added some "gourmet" tips and ideas for you to try, if you want to. 

Traditional Holiday Roast Turkey 

NOTE:  This recipe is based on a 15 pound bird, please adjust amounts based on the size of the bird. Roasting chart is down below, for different sizes.

Ingredients:
1 raw thawed turkey, about 15-18 lbs (or bigger for more people, but follow cooking guides)
½ stick (1/4 cup) butter, softened

Spices:
1 to 2 tsp of salt (depending on size of the bird)
½ tsp black pepper
1 tsp ground rosemary
1 tsp ground thyme
1 tsp poultry seasoning

1 cup turkey or chicken stock
1 roasting pan, large enough to easily hold your turkey and at least 3 inches deep
Aluminum foil for covering the bird (or a tight-fitting lid for roasting pan)
 

BEFORE COOKING:  Be certain your turkey and the roasting pan you have chosen (lid included, if any) will fit properly in your oven, with the oven door shut. Use only one rack, moved to the bottom level before heating, if necessary (you will need to remove any other racks). First you must thaw the turkey completely. A safe method is to place it in the refrigerator for 3 days before you plan to cook it. 5 days, if it is larger. Its best not to thaw it at room temperature, or warmer, as this can cause bacteria to grow. 

Directions:
1.       When you are ready to cook your turkey, preheat your oven to 325 degrees, F. If you will be stuffing the bird, prepare your stuffing now, according to directions/recipe.
2.        Remove turkey from any packaging it came in. Remove all giblets from the bird (neck, heart, liver, etc.).  Be sure to check inside both the chest area and in the neck area, as different companies store giblets in different areas of the bird. Set giblets aside in a bowl. These can be used later for gravy, if you wish. The bird's feet may be held in place by a plastic brace. You can pull the feet out for cleaning and stuffing, then pop them back in before cooking. These foot braces are oven-safe and will not melt. They hold the bird in a better position so it looks nicer. If there are no braces, you can use kitchet twine or dental floss to secure the bird's feet together, after washing. Place raw bird in a clean kitchen sink and thoroughly rinse with cold water, inside and out. Pat the inside and outside of the bird as dry as possible with paper towels, or a clean kitchen cloth. Remove from sink and place bird back-side-down in the roasting pan you plan to use for cooking. If it’s a foil pan, place a strong metal baking sheet underneath it for safe moving in and out of the oven, as a foil pan cannot support the weight of a turkey by itself, and the pan may buckle, causing a mess and injury. Please cook safely.  
3.       In a small bowl, mix all the spices together and set aside.
4.       Rub the softened butter all over the outside of the bird’s skin, like a coating.
5.       Sprinkle bird evenly all over, with the entire spice mixture. You can rub the spices into the skin with the butter, if you like. Be sure to return the bird to its back-side-down position. If you are going to stuff your bird, you may (loosely) pack your prepared stuffing into the chest cavity of the bird. If you previously popped the feet out of the foot braces, put them back in now, or tie them together. You can also tuck the pointy wing tips down, and behind the shoulders of the bird, so they don't poke through the foil. this is of course optional, but it is a nice, clean look.
6.       Pour stock into the bottom of the roasting pan, to help keep the turkey moist during cooking and add extra flavor. 
7.       Cover the turkey with either the fitted lid your roasting pan came with, or with aluminum foil, lightly greased on the side touching the bird, so the skin won’t stick to it. Foil should cover the entire bird, use 2 sheets side by side if needed and pinch them together. Secure the outer edges of the foil to the outer edges of the roasting pan. Try to leave some space between the foil and the turkey skin, if you can.  
8.       Carefully place roasting pan with turkey on the bottom rack of your oven and close oven door. Cook turkey for the recommended hours by pound. See chart below, based on whether the turkey is stuffed or not. Once per hour, you can open the oven to “baste” your turkey if you like, although its not necessary. You can use a spoon for this, or a baster.  If you choose to baste, its easier and safer to pull the bottom oven rack out a little bit and lift the foil to do your basting, instead of trying to move the turkey over to the counter.  Then simply seal the foil back up, push the rack back in and close the oven door to continue cooking.  


9.      For the last 45 minutes, remove the foil from the turkey and roast uncovered to help darken the skin.  Pay attention to the pop-up timer, if any. When the red center button pops up on the timer, the turkey is done. If there is no timer, stick to the chart.
10.   Clear off a nearby counter or table space to place your turkey on (use extra pot holders or a thick towel to protect your counter/table). Using pot holders to protect your hands, while you get a very secure grip on the roasting pan/tray. Very carefully lift the bird and pan out of the oven and quickly move it over to the counter/table space you have prepared. Let Turkey rest for at least 30 minutes to 1 hour before carving. Remember, it does not have to be piping hot, if you are serving it with hot gravy. DO NOT carve the turkey fresh out of the oven. All the juices are still runny liquid at this time, and will drain out of the meat, and the meat will be dry. Letting the bird “rest” for at least 30 minutes allows the juices to settle into the meat and thicken/cool a bit, so they won’t run out. This will keep the meat more juicy. After resting the turkey, carve and serve.   

TITIP:  Save juice from the bottom of the pan to make gravy. 

Q:  Is there anything I can do to make my turkey more "Gourmet"? 
A:  Yes!   Try some of these ideas:  


Add this to the butter:
Lemon zest
3 cloves minced garlic
Handful fresh chopped parsley

Try some of these tricks for extra flavor:
Salt and pepper the inside the bird too. 
Fill the bird with flavor-- an apple or orange cut in half, placed inside the bird, also leftovers of the zested lemon cut in half, an onion cut in half, bay leaves, a sprig of fresh rosemary, etc.
Try stuffing some of the butter under the skin, this makes the bird extra juicy
Sprinkle olive oil on top of the bird, to stop the butter from burning.

Easy Homemade Eggnog


 Ok so you have a bunch of family coming over for a holiday meal, and several of them don't think its a holiday, without eggnog. But you just swung by the grocery store and the eggnog shelf is empty! The other stores don't have it either. What do you do?  

Well, eggnog may seem like a fancy, complex beverage. But the truth is, its shockingly easy to make at home-- and with ingredients that most people already have in their kitchen. The best part is, if you know HOW to make it, you will never run out! 

At the last minute, or outside the holidays, you are far more likely to find the ingredients in any store, than you are to find the drink already prepared. This is especially true for anybody living/working in countries that don't have it available (military families, etc.) 

It does require a lot of eggs though, so I would advise you to stock up on those. But when you are finished here, you will have something better than store-bought-- and of course, bragging rights

This recipe makes about 4 to 5 servings, so you can double it, etc., for more people.

Ingredients     
6 egg yolks    
1/2 cup granulated sugar (100g)
1/4 teaspoons salt   
2 cups whole milk (480ml)
1 cup heavy cream (240ml)
1/4 teaspoon ground cinnamon  
1/4 teaspoon ground cloves
1/4 teaspoon ground nutmeg  
1 Tablespoon Vanilla Extract    
(this is a kid-friendly recipe, but you can add some bourbon to taste, for the adults if they like it)

** If you don't want to use cream, you can substitute the cream for more milk. 
 
Instructions 
1) In a medium bowl, whisk the eggs and sugar until well blended. 
2) In a saucepan over medium heat, combine the milk, cream, salt, vanilla, cinnamon, cloves, and nutmeg. Bring to a simmer, but do not boil.
3) Tempur the hot milk mixture into the egg yolk mixture, by slowly drizzling the milk into the yolks, whisking the yolks quickly to avoid clumps. Transfer milk/yolk mixture back to sauce pan. 
4) Cook on low, until mixture is thick enough to coat the back of a spoon. It will thicken more as it cools.
5) Pour custard through a fine mesh wire  strainer, into a large bowl. This will take out any small lumps for a smoother drink. Cover and refrigerate until well chilled, at least 2 hours, longer if you are increasing the recipe. You may need to stir before serving, as the spices tend to settle at the bottom. Serve chilled, with or without ice.

TIPS:  You can serve with extra whipped cream on top and a sprinkle of freshly grated nutmeg.  Store in the refrigerator up to 3 days.   

Want a great holiday dessert?  Simply skip the eggs and boiling, use heavy cream in place of milk, double the sugar and vanilla-- then place this mixture (with spices mixed in) into an ice cream maker.   Ta-da!   Eggnog ice cream!   Yes, you can still use the original mixture with the eggs if you like the color (after boiling).  It will be a thicker, richer ice cream.  But I still advise you to half-and-half the milk with cream at least, and bump up the sugar and vanilla.   You're welcome :)

Thursday, November 6, 2014

Mom's Buttercream Frosting


I couldn't let the holidays pass without sharing this one.  Every Christmas (or any time cake was being made at home), our Mom always whipped up a bowl of her simple butter cream frosting!   She would sometimes put equal amounts in separate bowls and add food coloring, if we were decorating Christmas cookies.   We used to sit at the table and decorate cookies for hours, then take plates of them over to family members and friends.   It sort of became a tradition, and people would ask when they are going to get their cookies!  The frosting was usually the highlight.   Sometimes money was tight and she did occasionally use margarine...   But she preferred real butter, whenever she had it. 

Mom's Buttercream Frosting

Ingredients:

3 cups powdered sugar
1 cup (2 sticks) butter, room temperature.
1 tsp vanilla extract
1 to 2 tablespoons milk or cream

Directions:

1.     1. In a medium bowl (or with a mixer or beater), mix together the butter and sugar, until fully combined.  If using a mixer or an electric beater, use low speed and/or a whisk attachment for a mixer.
2.      2. Add vanilla and cream/milk and continue beating together, until mixture reaches spreadable consistency.   More cream/milk can be added for thinner frosting, but do so in small quantities, as it thins out very easily (you may want it thinner if you are making something like cinnamon buns, but for cake or cookies, thicker is better).    Frost as desired.     

TIP:   This frosting is extremely versatile, you can add food coloring for different colors, and flavor extract for different flavors.  You can also blend in some cream cheese for a delicious cream cheese frosting!

Tuesday, October 21, 2014

French Cruller Recipe


I got this recipe from a Polish woman on YouTube.   So I tried it (since the ingredients were so simple, I already had them on hand).   They are SO GOOD!  A tender crisp on the outside.   Light, fluffy and airy inside.  Actually, crullers always reminded me of French toast a little bit.  And rightfully so, it is a very "eggy" batter.   But honestly, I would rather have these home made ones, than the ones in a coffee shop any day!   

French Cruller Recipe

Ingredients: 
 
Cruller Batter:
1 cup water
6 tablespoons (100g)  unsalted butter
¼ tsp salt
1 cup (135g) all-purpose flour
4 large eggs
Oil for frying

Glaze:
1 ½ cup powdered sugar
 tbsp honey or corn syrup
2 to 4 tbsp milk

Directions:

1.       Place water in a sauce pan.   Add the butter and salt. 
2.       Bring water to a boil on high and stir until everything is well combined.


3.       Add all the flour at once to the saucepan and mix until it is well blended with the butter, water and salt, about 1 minute.


4.       Reduce heat to medium.  Keep stirring until mixture forms a nice, paste-like ball.  When you see a thin, light film covering the bottom of the pan, the batter is ready.  This may take a few minutes.  


5.       Transfer batter into a mixing bowl.   Process in the mixing bowl with a mixing paddle for about 2 minutes (or by hand in a regular bowl for at least 5 minutes), to help cool off the mixture.   You don’t want to add the eggs to the mixture while its too hot, or they will scramble. 
6.       Add your eggs one at a time, beating them in thoroughly after each addition.  Blend batter for about 2 minutes until nice and smooth.


7.       Lay out some parchment paper, and very lightly oil it, or use a thin layer of cooking spray.  Then fill a piping/pastry bag with the batter (using the biggest star tip you have) and squeeze the batter in circle shapes on the parchment paper.   Each circle should be about 2.5 to 3 inches wide. 
8.       Cut the parchment paper into squares (one doughnut should be in each square). 


9.       Heat some oil in a large skillet.   The oil should be about 1 inch deep, and hot, but not smoking.  If it smokes, it is too hot.  Reduce the heat and wait a few minutes.   A small test drop of batter should begin to bubble right away.  
10.   Place each cruller fancy-side-down in the oil (the parchment paper square should be on top).   Don’t worry, the paper won’t burn.  Do not crowd the pan.    


11.   Wait a minute or so, then gently peel the paper off the crullers.   Fry until the crullers are golden (about 2 more minutes) and then flip and fry the other sides until they are also golden (3 more minutes).
12.   Remove crullers from oil and transfer them to a paper or kitchen towel to drain and cool.     
Prepare the glaze by mixing all the glaze ingredients together in a bowl, blending thoroughly.  
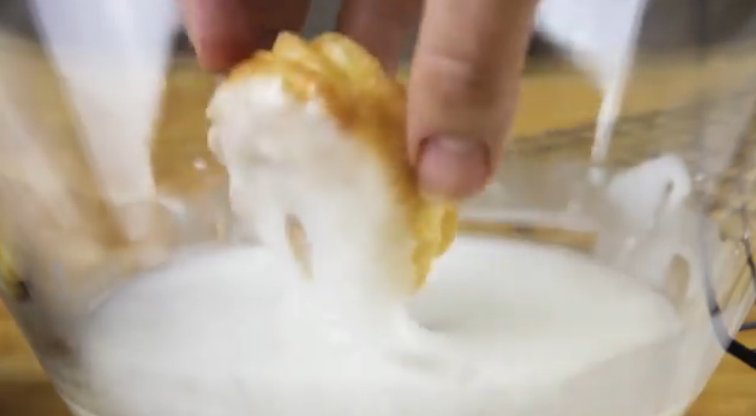
13.   Dip each cruller in the glaze and transfer to a rack to let the glaze set, about 20 minutes.  Serve fresh.