Wednesday, August 6, 2014

Melissa's Homemade Rice-A-Roni


 "Rice-A-Roni, the San Francisco treat." 

I can still hear that old jingle in my head followed by the trolly car bell 'ding'.   In the past, I always ate this dish from the box (like most Americans).    But as I grew up, I would occasionally find myself cooking dinner on one of those "a few more days till pay day" nights, and wanting a tasty side dish.  But I was out of a few pre-packaged things.   So I figured out how to make a pretty good rice-a-roni side dish, with just a few common ingredients most people have in their kitchen.  Hopefully you will find this helpful too on a night when you don't want to make a trip to the store just for a box of it...   I've also had "thank you" emails from people who are living and working outside the USA, where they cannot buy Rice-A-Roni in a store, and they miss it sooo much, so that may be another reason for learning to make it yourself.   Or just for the bragging rights, lol.   I used chicken bouillon for this recipe.  But you can use beef, pork, or vegetable-flavored.   You can also use broth instead of the water bouillon mix.  Maybe add some extra salt.  This recipe makes about as much as a regular box of Rice-A-Roni.

Melissa's Homemade Rice-A-Roni

Ingredients:

1/4 cup Uncooked angel hair spaghetti pasta, broken up in 1/2-inch pieces(break it in small batches)
3/4 cup uncooked long grain rice
2 tablespoons butter or margarine
1 tablespoon cooking oil
2 cups hot water
2 cubes of Maggi chicken or beef bouillon-- the soft, crumbly kind with the larger 1” x ½ inch cubes-- or just substitute the 4 cups of water and bouillon with 4 cups of broth (you can also use a packet of "beefy onion soup mix", its amazing!).

Directions:

1.       Start by pinching out very small batches of the pasta, and breaking it into little half-inch bits.   Drop them into a measuring cup until you have 1/4 cup.


2.       Measure out 3/4 cup of uncooked rice.   Combine in a bowl with the pasta bits, and mix until blended well.  


3.       Crumble and melt your bullion cubes into the 2 cups hot water, stirring to dissolve well.  Set aside. 


4.       In a large skillet with a well-fitting lid, melt the 2 tablespoons of butter/margarine and 1 tablespoon of cooking oil together (oil keeps butter from burning).  


5.       Raise to medium-high heat.  Dump in pasta/rice blend.   Stir to coat the rice in the oil/butter mixture.  You don’t want any pieces to be dry.  
6.       Spread rice out evenly over bottom of pan, so as much of the pasta gets heat exposure as possible.  Cook on medium high, stirring 20 seconds or so, until the pasta begins to turn golden brown.   Stirring will rotate the pasta so it will all get a chance to brown, and prevent burning.  
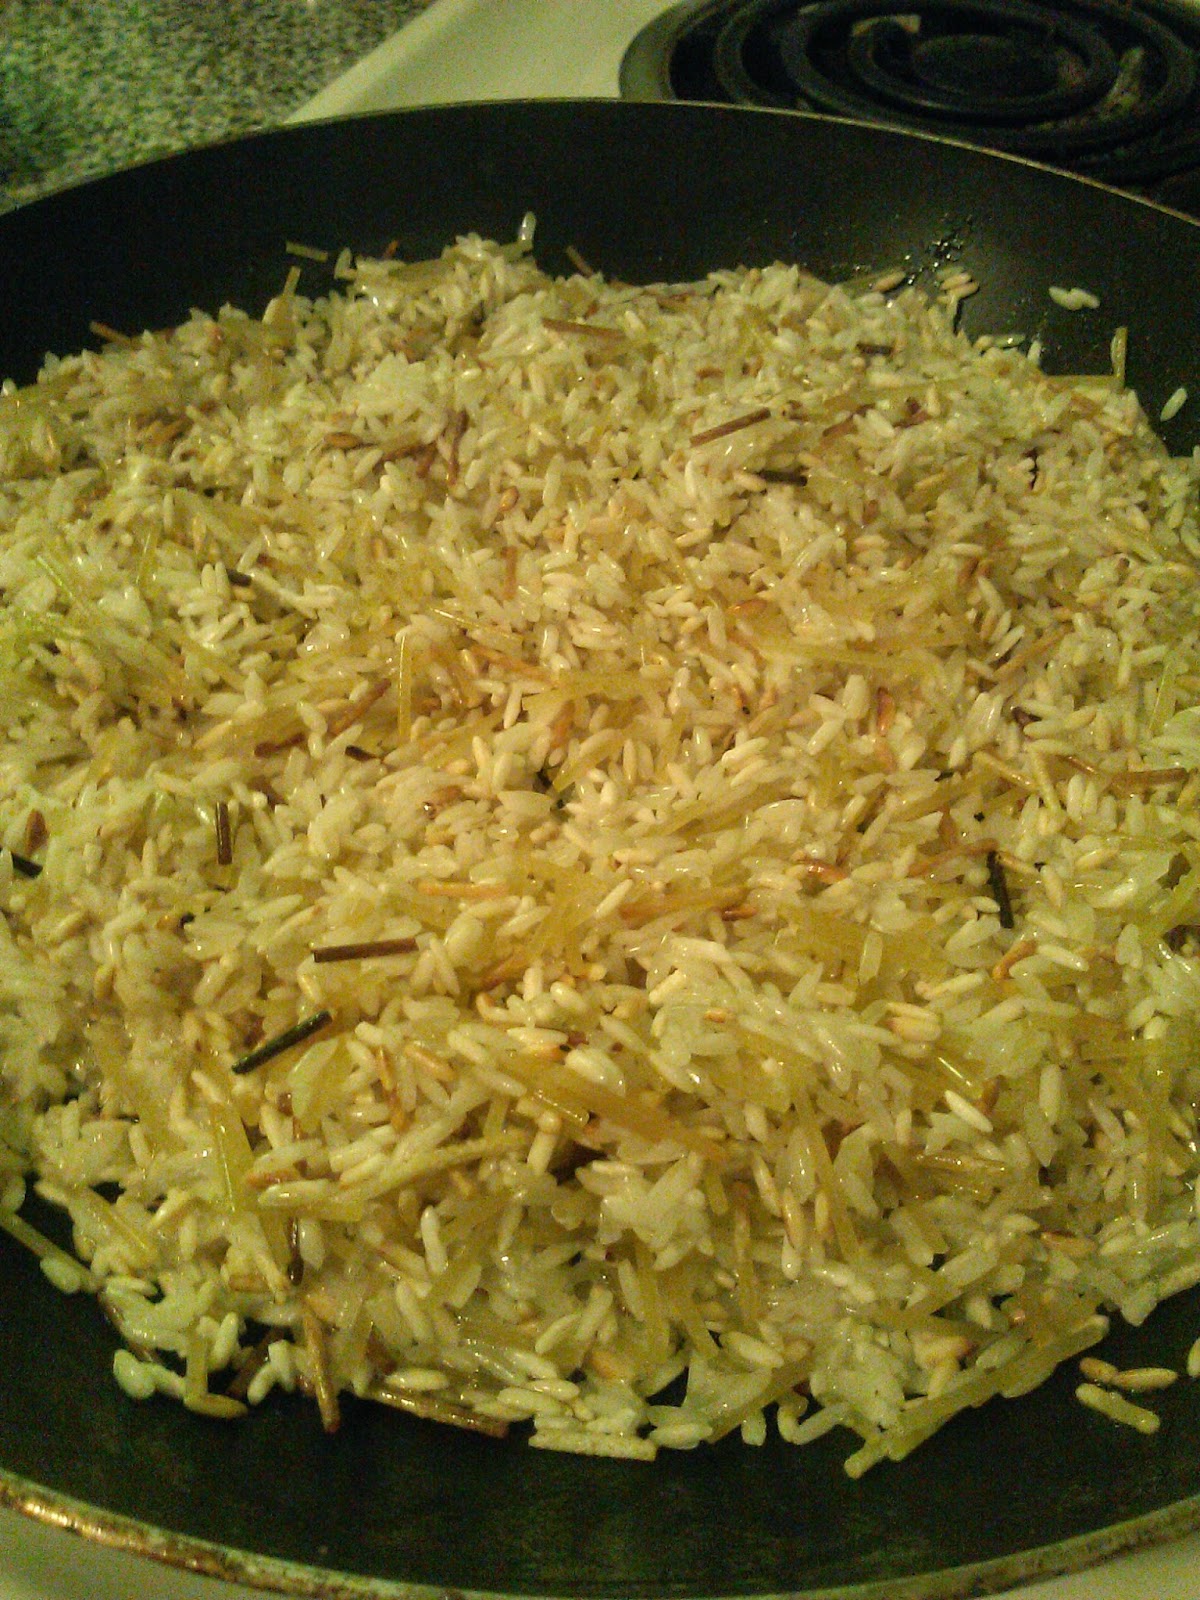

7.       Pour in your hot water/bullion mixture and blend well with the rice.   Turn the heat up to high and bring to a boil.   Once water is boiling, cover with a lid and reduce heat to low.   Leave rice alone for 20 minutes. DO NOT lift the lid.  Come back and check to see if it is done, by tasting some from the center.   Tilt the pan-- if there is still leftover water, or rice is not yet done, cover and let it finish cooking.   


8.       Remove from heat, uncover and let stand 5 minutes.
Serve hot as a side dish.


Auntie Anne's Soft Pretzels (Secret Recipe)


Ok everyone, if you love those hot, soft, slightly-sweet yet very buttery Auntie Anne's soft pretzels you find in airports, malls and some large shopping centers...   Then this recipe is going to make you extremely happy!   You see, they do sell Auntie Anne's at-home pretzel baking kits, complete with the secret pretzel mix, and other ingredients to mix up at home.   I got this particular recipe from a former Auntie Anne's employee who took one of the kits home and did some tedious figuring on the contents and ingredients, so we can all make our own at home, without having to buy the kit!  But I am sorry, I cannot tell you who he is.

Anyway, I just wanted to say that I have lived in Germany for a few years, and that is pretty much the home of pretzels.  Me and my Dad used to buy authentic German soft pretzels from the street venders over there.  Europeans use a much finer-ground flour than we do, and oooooohhhhh does it make for some soft, tender bread!   Mmmm.   And I can say, Auntie Anne's was the closest I have ever tasted to German pretzels.   But in America, the closest you can get to European flour, is bread flour, or a regular flour / bread flour mix.  Its not that big a difference though, you can just use regular flour, it still comes out awesome.   

Auntie Anne's calls the wash solution they bathe the pretzels in a "special solution".   But frankly, its just baking soda and water, lol.   Similar to what bagels would be bathed in before baking.   It helps to brown them.   In the past, it was done with culinary lye...    The original name is Laugenbrezel,  Laugen means basically lye.   But baking soda is...  A bit safer?  Anyway,  below is the recipe, with the same measurements and cooking instructions as in the box of the Auntie Anne's at-home baking kit.   Along with a pretzel twisting video, done by and Auntie Anne's "expert" pretzel maker.   Enjoy!

Auntie Anne’s Soft Pretzels (Secret Recipe)


Ingredients:


Dough Mix:
1 ¼ cups warm water
1 tablespoon plus ¼ tsp dry yeast
¾ cups powdered sugar
1 ½ tsp salt
2 tsp vegetable oil
3 ¾ cups all purpose flour (its better to use 3 cups regular flour and 3/4 cups bread flour)

Baking Soda Bath:
4 cups hot water (as hot as tap will get)
½ cup baking soda

Other ingredients:
¼ cup melted butter
Kosher or pretzel salt

Directions:
1.      In a large bowl, dissolve yeast in warm water, let stand 5 minutes. Whisk in vegetable oil.
2.      In a separate bowl, mix flour, powdered sugar and salt.   Gradually add flour mixture to water/yeast mixture.   Add little bits at a time, blending well.   Only add enough flour to form into a slightly sticky dough.  Dough should come away from the sides of the bowl, but it should be soft and easy to knead, not too dry or firm / dense.   Knead 5 minutes on lightly floured surface.  Dough will be nice and smooth when it is ready.  
3.      Place dough into lightly oiled bowl.  Lightly oil some plastic wrap, and cover the dough with plastic wrap (oiled side facing the dough).  Allow dough to rise in a warm place for about 45 minutes, or until dough doubles in size. 
4.      Preheat oven to 425.
5.      Make a bath for the pretzels by mixing baking soda in the 4 cups of warm water until it is dissolved. 
6.      Lightly oil a surface on your counter to lay the dough on.   Remove dough from bowl (without flattening it) and place it on the counter.   Cut dough into 8 equal strips, using a knife, a large pizza roller or a pastry cutter.  Strips should be 1/5 inches wide and 8 inches long.   Cover the rest of the dough, while you work with each piece of dough. 
7.      Roll each dough strip into pretzels, as wide as your finger, long as your arm.   Using the method in this video: 


8.      Dip each pretzel in baking soda solution.  Lay pretzel on a clean kitchen towel to remove excess baking soda solution for a second.  Then place on a lightly greased baking sheet. 
9.      Salt the pretzels (if you want cinnamon-sugar pretzels, leave them unsalted). 
10.  Bake pretzels for 4 minutes, then rotate the pan halfway and bake an additional 2 to 5 minutes, depending how hot your oven bakes.  Pretzels should be golden with a couple of brown spots, but not completely brown all over. 
11.  Remove from oven, let cool a couple of minutes.   Brush with melted butter and eat! (if you want cinnamon-sugar pretzels, dip them in cinnamon/sugar mixture after brushing with butter).

Makes 8 pretzels

Wednesday, July 30, 2014

Perfect Homemade Brownies (from scratch, simple)


This is my favorite homemade brownie recipe.  Its very much like a box mix.   In any cake/brownie recipe, I always use cake flour.  It really makes a world of difference.  But usually regular flour works fine too.  This is just so easy if you don't have the boxed mix, and most of the ingredients are already in the average baker's pantry (well, some may need to buy the cocoa powder...).   Great with a scoop of ice cream on top.   If you keep these covered, they will be nice and chewy.

Homemade Brownies (from scratch, simple)

Ingredients:

¾ cup vegetable oil
1 ½ cups sugar
1 ½ tsp. vanilla extract
3 eggs
¾ cups flour (cake flour is best)
1/3 cup + 2 ½ tbsp cocoa powder
¼ + 1/8 tsp baking powder
¼ tsp salt

Directions:

1.        Preheat oven to 350 degrees.   Grease a 9x9 inch square baking pan.
2.       In a large bowl, mix together the oil, sugar, and vanilla extract. 
3.       Add eggs one at a time, and blend well (you can use an electric beater for this, on low).
4.       In a separate bowl, sift together flour, cocoa powder, baking powder and salt.
5.       Slowly add the egg mixture to flour mixture, until well combined.
6.       Pour batter into the pan, and spread evenly.
7.       Bake 25-30 minutes, or until toothpick inserted comes out with a few crumbs.  After cutting the brownies in 2-inch squares, you will need a spatula to remove them.  Allow them to rest of a plate, and cover them.
TIP:  After cooling brownies to room temperature, you can spread a thin layer of Nutella over the top, and sprinkle with crushed hazelnuts, or any other nuts you like.   You can also add chopped walnuts to the batter before baking. 

Melissa's Crock Pot Rotisserie Chicken


Of course we all know that traditional "rotisserie chicken" cooked by the bird being skewered down the middle and rotated over heat to baste and cook in its own juices...   But those of us who love our dear slow cookers have tried to mimic the process many times.  

I have found that in most attempts to do a rotisserie in the crock pot, the skin comes out pale and soggy.   So I thought, "What if you braised / fried the outside of the skin to brown it a bit, before putting it in the slow cooker?"  

This recipe involves doing just that.   Sure, there is a bit more prep work involved, but when I tried this, it came out rather yummy!  :) 

Melissa’s Crock Pot Rotisserie Chicken


Ingredients / Materials:

1 whole fryer chicken
2 tablespoon cooking oil
2 cubes (1/2 inch x 1 inch each) soft Maggi chicken bullion, crumbled
4 cloves garlic, finely minced, or shredded (or 3 tsp garlic paste from a squeeze bottle)
½ tsp ground rosemary
½ tsp poultry seasoning
2 tsp salt
½ tsp black pepper
1 tsp paprika
Kitchen foil


Directions:

1.       Pat chicken dry, all over, with paper towels.   Skin will not brown properly if it is too dry. 
Lift the skin of the chicken by the neck to expose the top of the breast meat.   Using a knife, cut a slit in the breast meat (do not pierce the skin) long and deep into the middle of the breast.  Stuff the cut with some of the crumbled bullion.   Do this on both sides of the breast.   Repeat with the thighs, gently peel the skin away to expose the thigh meat, cut a slit in the meat, and stuff with crumbled bullion.  ** You can also dissolve the bullion in a few tablespoons of hot water and inject it into the meat with a flavor injector).
2.        In a large skillet, heat oil over medium-high heat.  Place *whole* chicken in the pan.   Fry on each side (front, back, left/right sides).  Your goal is not to cook the meat, but only to make the skin golden-brown.  It may take up to 3 to 5 minutes on each side.  Be careful, oil may splatter.  Remove chicken from pan when skin is golden brown, set aside on a plate.  Allow chicken to cool until you can easily touch it without getting burned. 
3.       Rub the outside of the chicken evenly with the minced garlic.   Then combine the other spices together in a small bowl (rosemary, poultry seasoning, salt, pepper, paprika).  Rub spice mixture all over the outside of the chicken. 
4.       Wad up 4 balls of kitchen foil (each the size of tennis balls) to act as a rack for your chicken.  Place the foil balls in the bottom of your slow cooker.   Lay the chicken(breast-side-down) on top of the foil balls. 
5.       Place the lid tightly on your slow cooker, and cook the chicken on LOW, for about 6 hours.   Enjoy!

Tuesday, July 1, 2014

Egyptian Baked Chicken


 When most people hear about Egypt, they think of the pyramids, the Nile, caravans, dancers and the massive city of Cairo.  But the truth is, Egypt has another intriguing asset—the food.  Egyptians love to eat, and whenever they cook a meal (especially for a holiday or a family gathering), they usually make enough to feed a small army.  Not just one or two, but several tempting dishes are laid out on the table for variety.  This baked chicken recipe is extremely common in many homes and there are variations of it as well, using beef and even fish.  A lot of Egyptians will also add peas as an extra vegetable to this dish.   Or a variation of eastern spices.   I make this dish whenever I want something hearty and filling.   It is usually accompanied by flavored rice.  I often use Rice-A-Roni, because its so quick and easy.  But you can use any rice recipe.    

Egyptian Baked Chicken 


Ingredients:

1 whole chicken, cut up (or about as much of any pieces you have) and boiled until just done, then drained
2 diced medium onions
2 more medium onions sliced into rings, kept separate from diced
2 large green sweet bell peppers, seeded and sliced in rings
3 medium tomatoes, diced
1 tablespoon black pepper
½ tsp salt
1 tablespoon ground cumin
1 1sp turmeric powder
6 cloves minced garlic
1 cup chicken broth
4 tablespoon vegetable oil

Directions:
1.       In a large skillet over medium heat, fry diced onions in oil until clear.


2.        Place boiled chicken pieces into pan with onions.  Sprinkle cumin, black pepper, salt, turmeric and garlic on top and blend everything together well.  Cook 5 to 6 minutes, stirring occasionally to prevent garlic from burning.


3.       Spread ring-sliced onions out evenly in a 9x13 casserole dish.  Layer the tomatoes over the onions in the same way, followed by the green peppers.   


4.       Lay the chicken (and all the pan drippings) evenly in casserole dish over the vegetables.
5.       Pour all the chicken broth over the top of the chicken and vegetables.


6.       Preheat oven to 350 and bake chicken until it is brown, and vegetables are tender and caramelized (45 minutes, or more if needed).  Serve hot with rice.